Salient Mega Menu
Getting Started
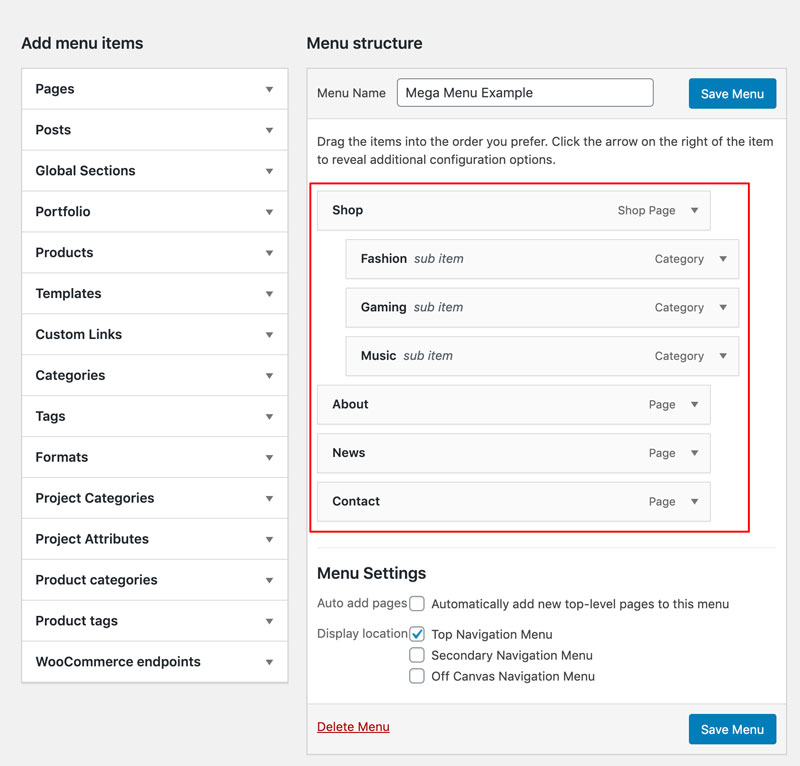
Head to Appearance > Menus in your WordPress admin panel. To start creating a mega menu, create a basic submenu structure by nesting a few menu items.
In our example, we’ve moved three menu items to be children of the ‘Shop’ item.
Front-end Display
After setting that up, a standard dropdown will display for the child menu items when hovering over the top level item as demonstrated below.

How Menu Options Work
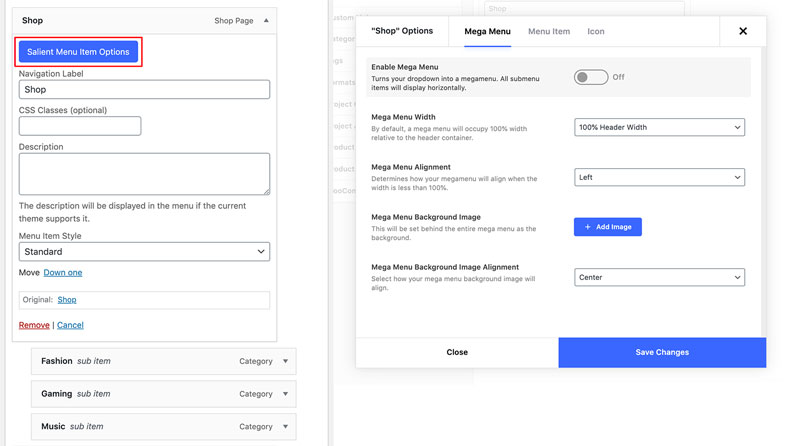
Options are grouped into tabs based on their category on the top. You can switch between each group by clicking on the relevant tab.
The menu items that are available will change based on how deep a menu item is nested. For example, top level menu items are the only items which can enable a mega menu, and secondary items have specific options relating to defining their column width within a mega menu.
Basic Mega Menu
To create a basic mega menu setup, we’ll add some additional child items and then enable the mega menu option on the top level item, ‘Shop’.
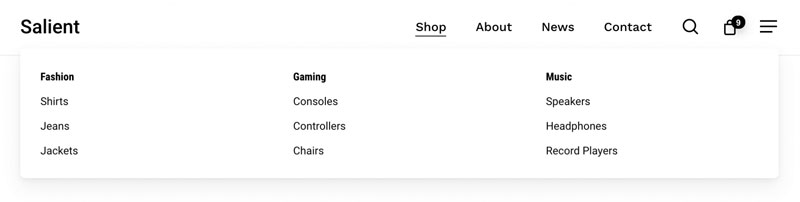
In a mega menu, each direct child menu item (denoted in purple below) will become a column. Further menu items can then be nested in each column (denoted in yellow below).

Front-end Display
Multiple Headings Within One Column
Since direct children within a mega menu show their label as a column title, we can hide that by making use of the ‘Disable Mega Menu Item Title’ option. With that option on, the direct child item will act only as a column, and not display any text. Further items can then be nested within the column (denoted in green below) and display their labels above each set of children.

Front-end Display

No Column Heading Titles
Making use of the same ‘Disable Mega Menu Item Title’ option as the above variant, we can simply remove the heading label from all columns. In this instance, we don’t need to nest an additional level since we don’t need any group headings.

Front-end Display

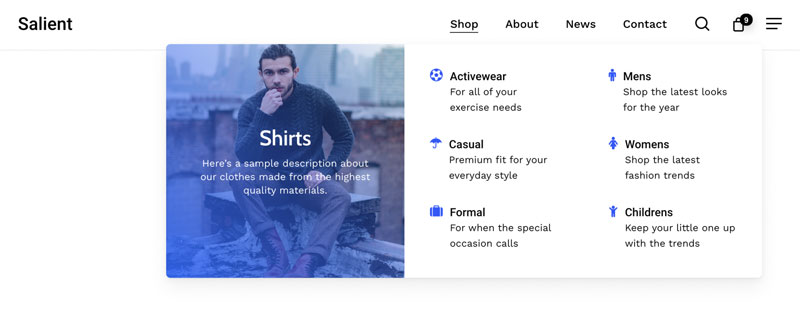
Mega Menu Example
Here’s an example that takes the design up a notch by utilizing more menu options.
A Breakdown of the Menu Options
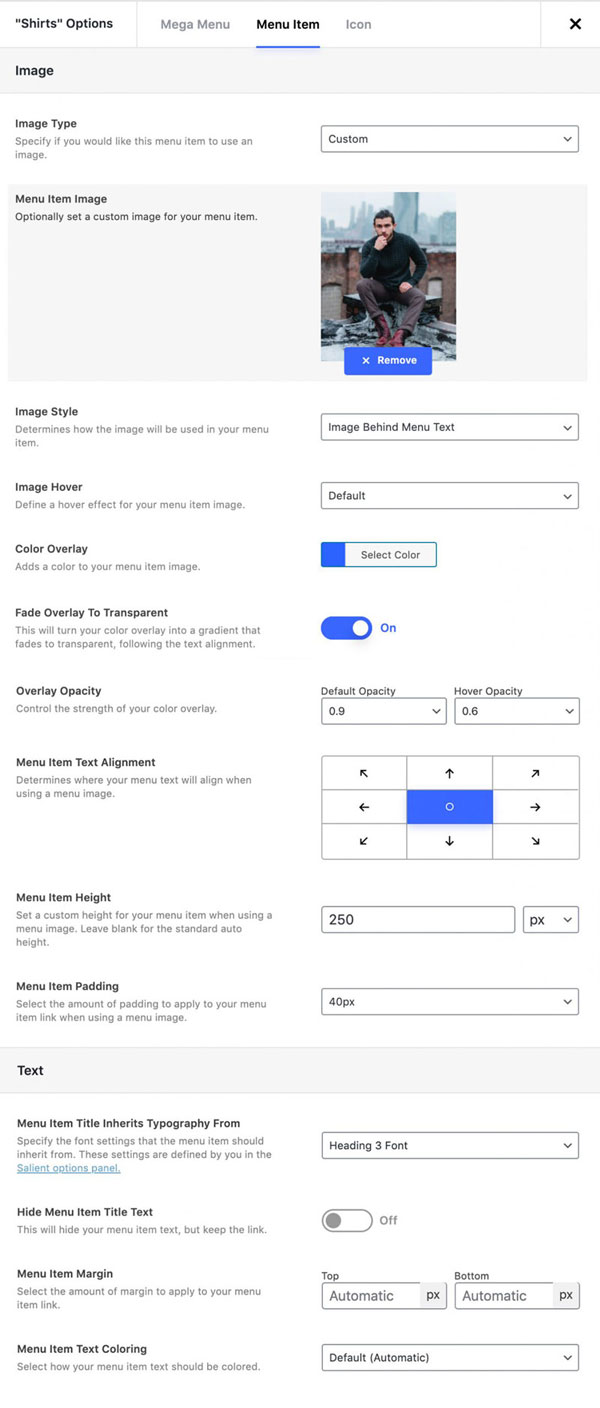
Shirts Menu Item
Going through each mega menu section from left to right, we’ll take a look at the ‘Shirts’ item settings first.


Blank Column Items
The next two child menu items have all the default settings, except for the menu item title disabled. This renders them as empty column holders for the nested menu items.
Icon Menu Items
All the remaining menu items within this mega menu example make use of the same settings, with different icons assigned.

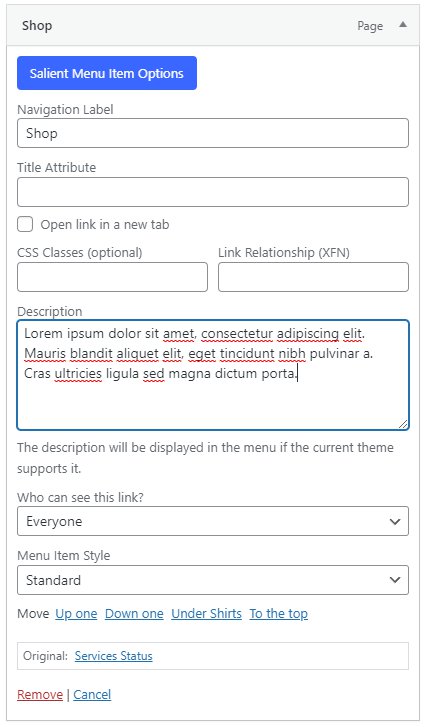
Menu Item Description
Each of the menu item also makes use of the WordPress ‘Description’ field to display a subtitle. If you do not see the description field in your menu items, ensure the following
- The description field is enabled in your WordPress screen options (located at the top right corner of the menu page) as shown in the below screenshot.
- The theme option is enabled to display descriptions within submenus. The option can be found in the Salient > Header Navigation > Dropdown/Megamenu tab. Under Header Dropdown Display Descriptions.

Menu Item Colours
To apply custom menu item colours go to Menu Item > Text > Menu Item Text Colour and select Custom Colouring.
If the option is set to Default it will pick up global styling. To globally change menu item colours, go to Salient > Header Navigation > Logo & General Styling. For newer versions of Salient, got to Salient > Header Navigation > Colour Scheme.

