Creating & Linking Google Analytics/Google Ads/Search Console
Google Analytics
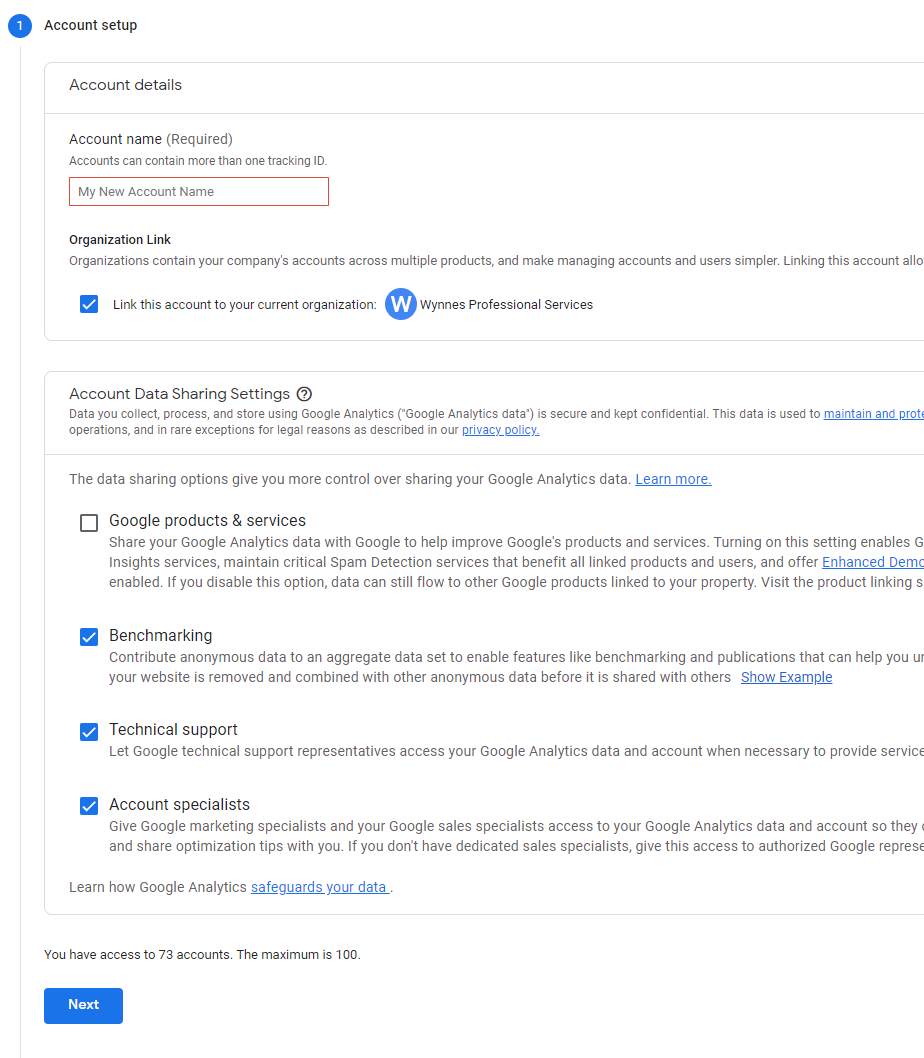
Start by creating a new account. To do this, log into Google Analytics then navigate to admin at the bottom of the menu on the left. Click ‘+ Create Account’ at the top of the page to open the account setup. Enter the account name and tick the organisation link to connect the account to the Wynnes account. It is recommended that you enable all the data sharing settings.
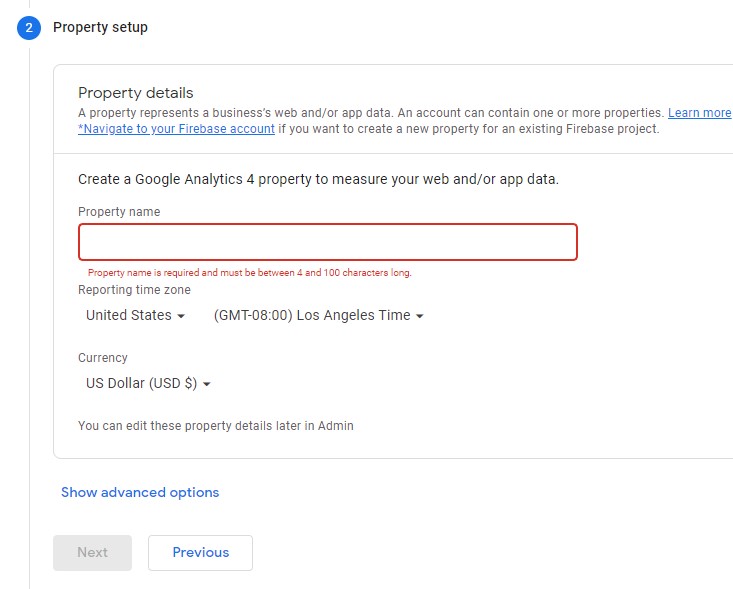
Next, enter the same name for the property name, then select the relevant time zone and currency that best suits you. In the third section, select the business size and goals which best describe what you are looking to track, click create.
Now you have created an account and property for the website you are looking to track, Google will give you the option to link the account to your website. Choose the Web option and enter the web address for your website. The measurements will be automatically selected based on your previous choices, add, or remove options but page views are always handy.
You will also be given a Google Analytics Tag in HTML to add to your website. This can be added into your website by navigating in the back-end to Salient => General Settings => CSS/Script Related. Add the code directly to the field named Custom JS Code (Head), hit save changes and you now have tracking added to the website. If you need to find the Tag again go to the GA4 property, go to the Data Streams tab then click on the domain listed. In the slide out menu click on the Global site tag (gtag.js) listed under tagging instructions – add new on-page tag.
Google Ads
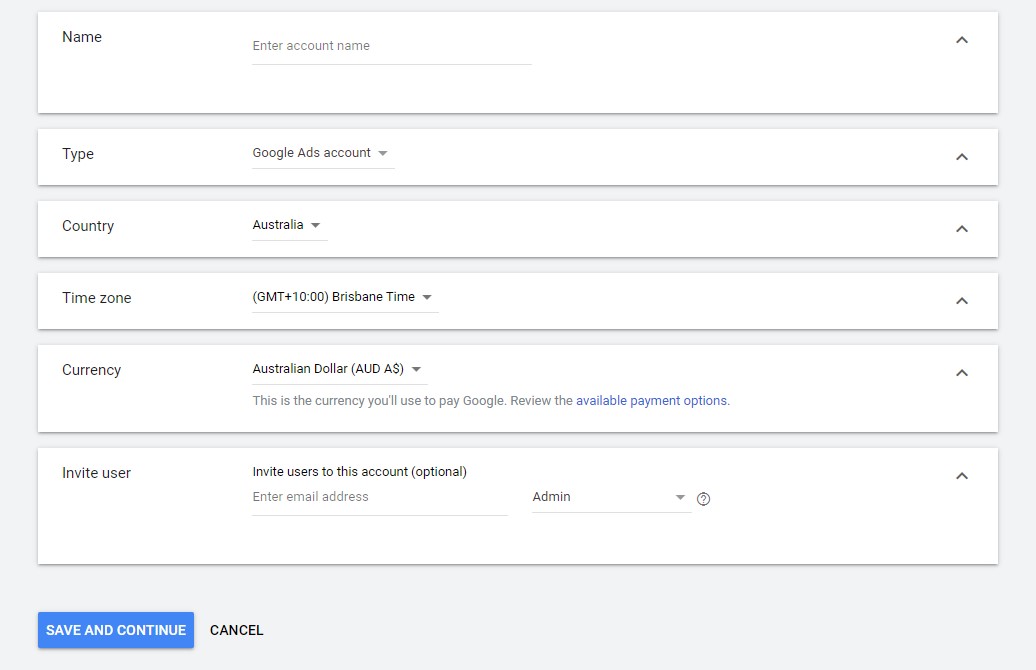
Once logged in to Google Ads, navigate to Accounts – Performance in the side menu, then select the + at the top left of the table and create a new account. Fill in the name, keep the type as Google Ads account, change the country, time zone and currency to suit the website. Invite additional users at the bottom and assign a permissions role to the account.
Once you save and continue, you will be asked to verify your identity to set up the billing information. After you have selected and saved a billing account, you will be able to link this account to your analytics account.
Linking Analytics and Ads
Google Documentation: https://support.google.com/analytics/answer/1033961?hl=en#zippy=%2Cin-this-article
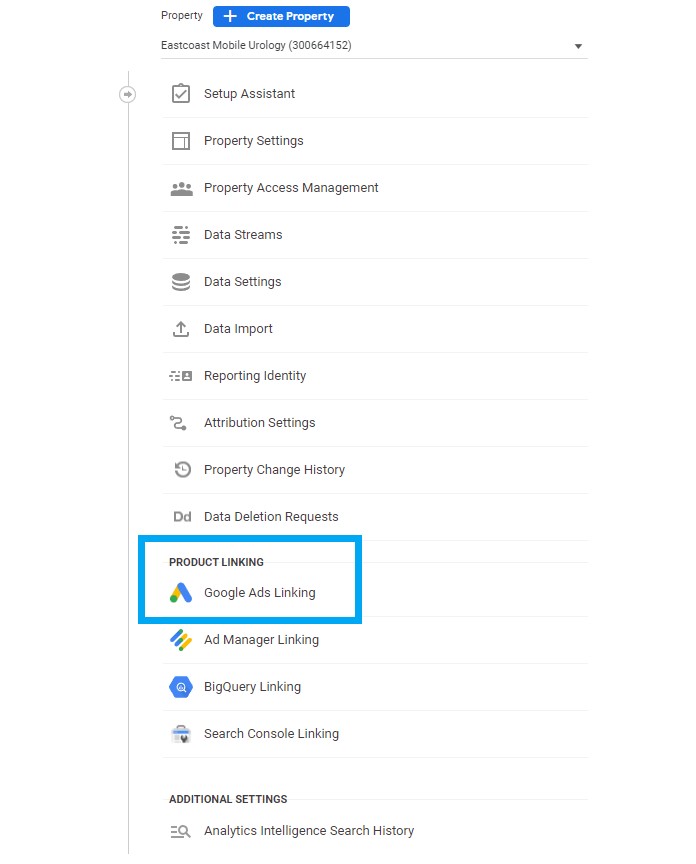
Once logged into your analytics account, go to the admin menu at the bottom of the left side menu then select the property you want to link. In the property menu is a Product Linking section towards the bottom, select the Google Ads Linking option.
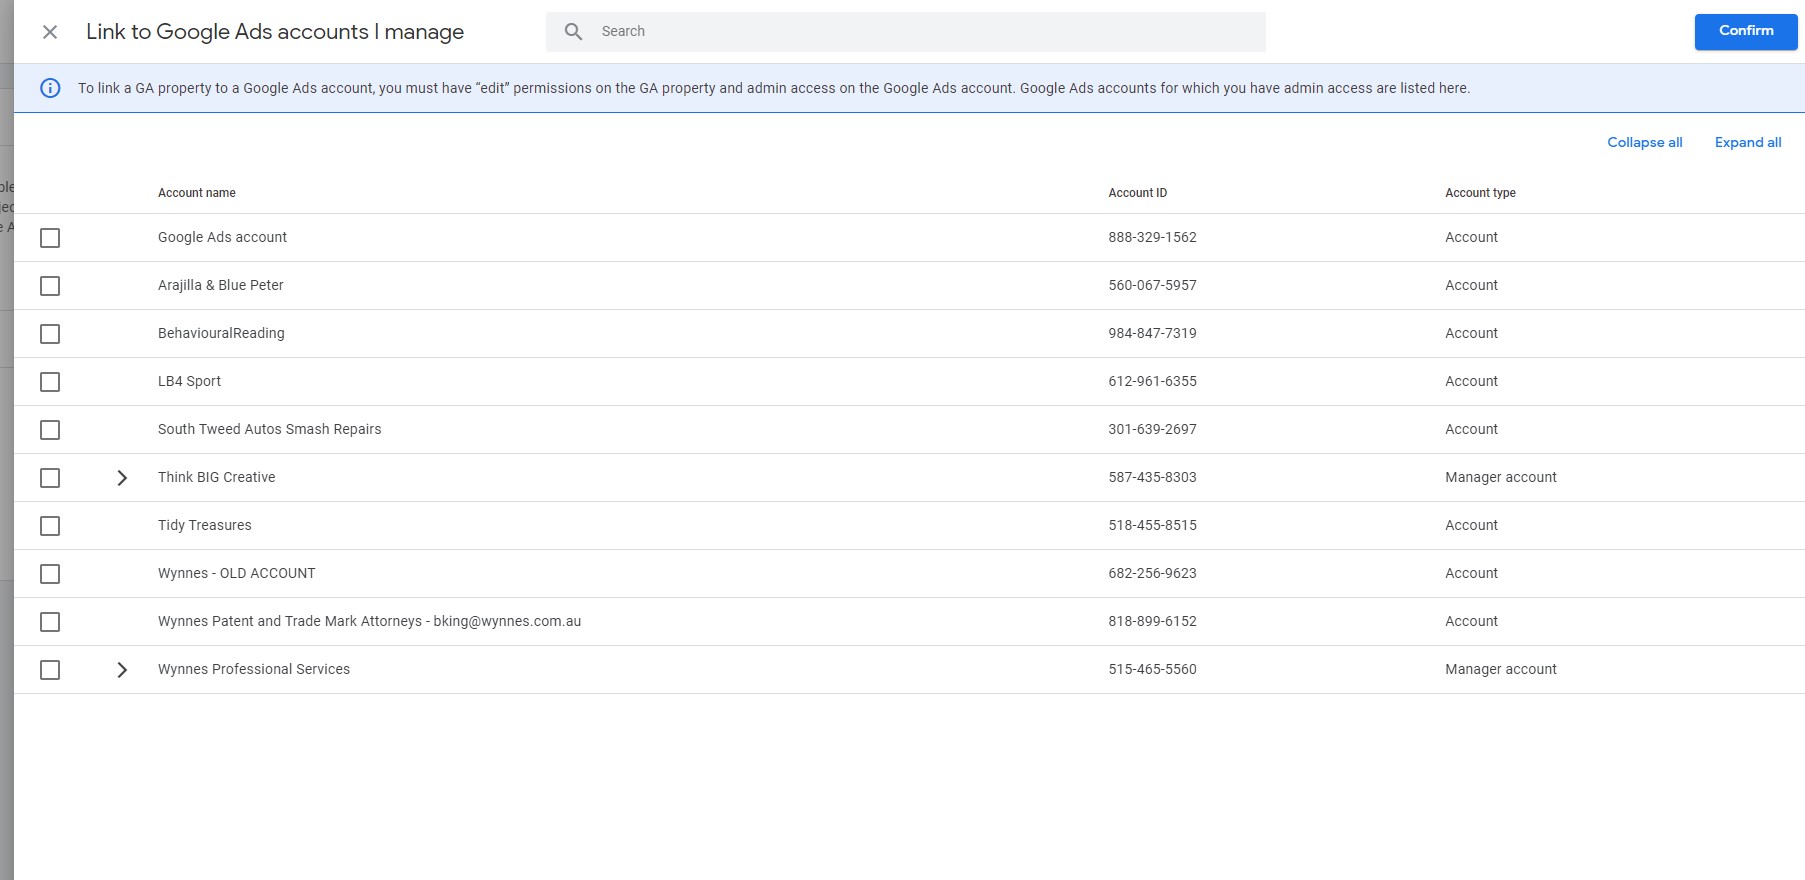
To link your account to your Ads account, select the blue ‘Link’ button on the top left, this will open a new panel. Select the ‘Choose Google Ads accounts’ button which will bring up a list of accounts, if your new account was linked to another account in the beginning, it will appear in the drop down of the parent account. Select your chosen account then confirm at the top right of your screen.
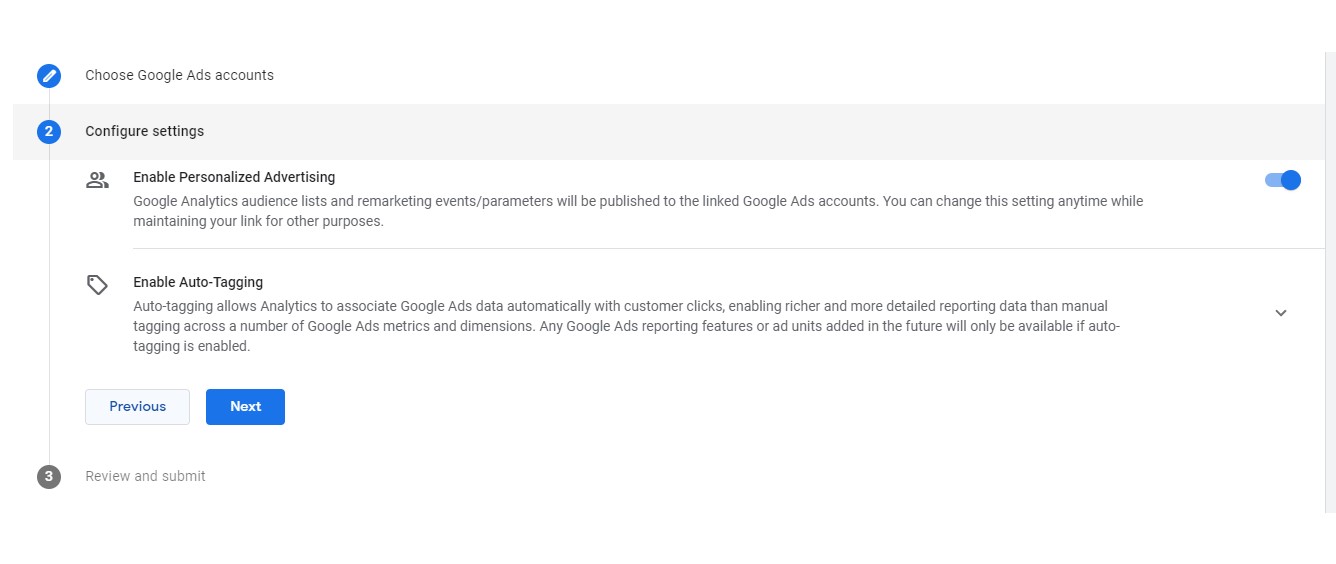
In the configure settings section you can choose to leave all options on, but you can always change these options after you link the accounts. Click through the next button, then click submit. Now your ads and analytics accounts are linked.
Search Console
Google Documentation: https://support.google.com/analytics/answer/1033961?hl=en#zippy=%2Cin-this-article
Open Search Console through Google and start by clicking on “+Add Property”. Enter your web address in the Domain section then click continue. You will be prompted to “verify domain ownership via DNS record”. Copy the text given then navigate to Cloudflare and open the DNS records for the domain. Add a TXT record adding the copied text to the Content section and using an “@” in the Name section. Once this has been added, go back to Search Console and click verify. Once verified you will be able to add to Sitemaps. Find the sitemap of any website by adding sitemap.xml to the end of the home URL of your site. Copy this web address and paste it in the “Add a new sitemap” section located in the left side menu under Index – Sitemaps.